Run your local Kubernetes clusters with Kind
If you’re looking for Kubernetes Cluster for your local development then kind is the best choice. Basically, kind was primarily designed for testing Kubernetes itself but may be used for local development or CI. In this post, we take look steps on how to configure, deploy sample application onto to kind cluster.
kind is more like Minikube which is a lightweight Kubernetes implementation that creates a VM on your local machine and deploys a simple cluster containing only one node. Minikube is available for Linux, macOS, and Windows systems.
Quick Snapshot
Step #1: Install kind
Stable binaries for kind are available on the releases page. To install, download the respective binary for your platform and place into your $PATH. Here I’m using Linux so I have downloaded *amd64 binary release.
curl -Lo ./kind https://github.com/kubernetes-sigs/kind/releases/download/v0.7.0/kind-$(uname)-amd64
chmod +x ./kind
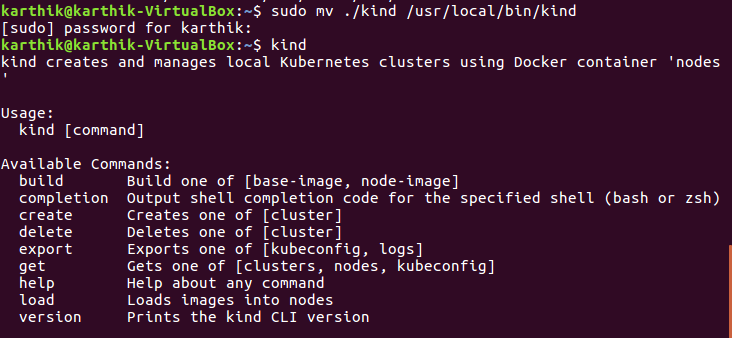
mv ./kind /some-dir-in-your-PATH/kind

Once the binary is downloaded place kind binary into your $PATH.

kind does not require kubectl, but you will not be able to continue on the below sample deployment.
Step #2: kubectl installation
kubectl is the Kubernetes command-line tool that allows you to run commands against Kubernetes clusters. You can use kubectl to deploy applications, inspect and manage cluster resources, and view logs.
Download the latest release of kubectl with the following command:
curl -LO https://storage.googleapis.com/kubernetes-release/release/$(curl -s https://storage.googleapis.com/kubernetes-release/release/stable.txt)/bin/linux/amd64/kubectl
Make the kubectl binary executable chmod +x ./kubectl and Move the binary into your PATH sudo mv ./kubectl /usr/local/bin/kubectl
To check if the kubectl configuration is successful, run kubectl from the terminal.
Step #3: Create a new cluster
Now that we have the basic setup ready, we can set up a new cluster. kind create cluster command would create a new cluster. This command will bootstrap a Kubernetes cluster using a pre-built node image.

By default, the cluster will be named as kind. If you wish to name it differently, use the --name flag to assign a different context name.Use kubectl command to inspect the cluster that we have created.

In order for kubectl to find and access a Kubernetes cluster, it needs a kubeconfig file, which is created automatically when you create a cluster but here if you have noticed,I have supplied --context to the command to look for the cluster.
You can also check the nodes in the cluster using kubectl get nodes command.

Step #4 : Deploy Nginx app to one of the nodes of the cluster
Let’s run our first app on Kubernetes cluster with the kubectl applycommand. The applycommand creates a new deployment. We need to provide the deployment YAML configuration, I have provided one of the sample Nginx application.

Congrats! We have just deployed the first application by creating a deployment. Following is what the command has done for us:
- Searched for a suitable node where an instance of the application could be run (currently we have only 1 available node)
- Scheduled the Nginx application to run on that node.
- Configured the cluster to reschedule the instance on a new Node when needed.
Here is the deployment configuration that we have deployed:
apiVersion: apps/v1 # for versions before 1.9.0 use apps/v1beta2
kind: Deployment
metadata:
  name: nginx-deployment
spec:
  selector:
    matchLabels:
      app: nginx
  replicas: 2 # tells deployment to run 2 pods matching the template
  template:
    metadata:
      labels:
        app: nginx
    spec:
      containers:
      - name: nginx
        image: nginx:1.14.2
        ports:
        - containerPort: 80

Once the application instances are created, a Kubernetes Deployment Controller continuously monitors those instances. If the Node hosting an instance goes down or is deleted, the Deployment controller replaces it.
To list your deployments, use the get deployments command:

Some of the useful kubectl commands are below.
- kubectl get – list resources
- kubectl describe – show detailed information about a resource
- kubectl logs – print the logs from a container in a pod
- kubectl exec – execute a command on a container in a pod
Step #5 : Expose Nginx app outside of the cluster
To expose the app on to the outside world, use expose deployment command. Pods that are running inside Kubernetes are running on a private, isolated network. By default, they are visible from other pods and services within the same Kubernetes cluster, but not outside that network.
To see the Nginx landing page, you can do so by navigating to the http://localhost:80
Step #6 : Delete app and cluster
To delete the app, run delete deployment command:
kubectl delete deployment nginx-deployment
For deleting the cluster,use the following command:
kind delete cluster
Like this post? Don’t forget to share it!
Additional Resources :
- Additional Kind resources
- Official documentation as a reference to understand any command.
- If you’re looking for Kubernetes examples, here it is GitHub
- Get smallest, fastest, fully-conformant MicroK8s Kubernetes
- How to back up and restore your Kubernetes cluster resources and persistent volumes?
- 10 BEST Kubernetes monitoring tools
Summary
Article Name
Run your local Kubernetes clusters with Kind
DescriptionIn this post, we take look steps on how to configure, deploy sample application onto to kind cluster.
Author
Karthik
Publisher Name
Upnxtblog
Publisher Logo


More Stories
Gateway API vs. Ingress API in Kubernetes: A Modern Approach to Traffic Management
Introduction As Kubernetes continues to evolve, so does the need for more flexible and extensible methods for managing traffic into...
Unlock the Potential of Java Microservices for Scalable Solutions
In today's rapidly evolving digital landscape, businesses and developers are continuously searching for efficient, scalable solutions to meet their complex...
How You Can Improve Your Business’s Performance with a Kubernetes Ingress Controller
Improving your business is vital to not only its progress but also its survival. There are many areas where this...
Enforcing policies with Kubewarden on Amazon EKS
According to Red Hat's 2022 State of Kubernetes Security Report, respondents stated that exposures due to misconfigurations in their container...
Top Kubernetes Security Best Practices: Securing Kubernetes Workloads with OPA & OPA Gatekeeper in Amazon EKS
Introduction As the adoption of container orchestration platforms like Kubernetes increases, so does the need for robust security measures. Open...
Choosing the Right Container Orchestration Service: A Guide to AppRunner, ECS, and EKS
AWS provides several services for running containerized applications, including Amazon Elastic Container Service (ECS), Amazon Elastic Kubernetes Service (EKS), and...
Average Rating