Explore Docker layers using Dive
We know that the Docker image is built up from a series of layers. Each layer represents an instruction in the image’s Dockerfile. Consider the following Dockerfile:
FROM ubuntu:18.04
COPY . /app
RUN make /app
CMD python /app/app.py
Above Dockerfile contains four commands, each of which creates a new layer. The FROM statement starts with creating a layer from the ubuntu:18.04 image. The COPY command adds some files from the current directory. The RUN command builds application using the make command. Finally, the last layer specifies what command to run within the container. Each layer is only a set of differences from the layer before it. The layers are stacked on top of each other.


Docker, when you create a new container, it adds a new writable layer on top of the underlying layers. This layer is often called the “container layer”. All changes made to the running container, such as writing new files, modifying existing files, and deleting files, are written to this thin writable container layer. The diagram below shows a container based on the Ubuntu 18.04 image.
With this context, let’s check out the Dive tool to analyze your docker images, changes in each layer.
Key Features :
- View Docker image contents broken down by each layer, you can fully explore the file tree with the arrow keys.
- Files that have changed, been modified, added, or removed are indicated in the file tree. You can find what’s changed in each layer. This can be adjusted to show changes for a specific layer or aggregated changes up to this layer.
- Estimate “image efficiency”, you can also find out how much is the wasted space your image contains. This could be due to duplicating files across layers, moving files across layers, or not fully removing files. Both a percentage “score” and total wasted file space is provided.
- Quick build/analysis cycles with single command.
- CI Integration so that you can analyze an image and get a pass/fail result based on the image efficiency and wasted space.
- Multiple Image Sources and Container Engines Supported.
#1.Install Dive
For Ubuntu/Debian, deb the package is available here.
wget https://github.com/wagoodman/dive/releases/download/v0.9.2/dive_0.9.2_linux_amd64.deb
sudo apt install ./dive_0.9.2_linux_amd64.deb


Now we have got Dive installation complete, we can dive into the image.
#2.Dive into image
To analyze a Docker image simply run dive with an image tag/id/digest:
dive <your-image-tag>
Below, I have an example of MongoDB image


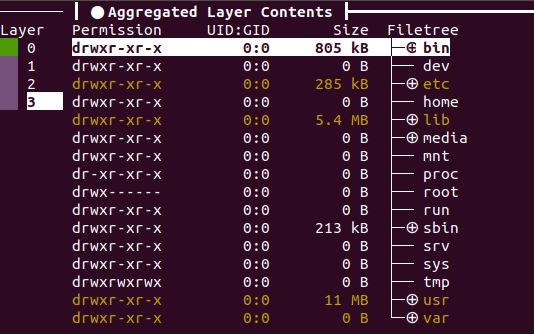
As you select a layer on the left, you can see the contents of that layer combined with all previous layers on the right. Also, you can fully explore the file tree with the arrow keys.
Let’s take one more example image and dive into layers.


Apart from analyzing the image, you can integrate with your CI pipeline and analyze your docker image, giving it a pass/fail indication via return code.
Like this post? Don’t forget to share it!
Additional Resources :
- What are the key Kubernetes metrics that you have to monitor ?
- Take look at Podman, Red Hat’s daemon-less Docker Alternative
- TensorFlow: Data and Deployment Specialization from deeplearning.ai
- How to back up and restore your Kubernetes cluster resources and persistent volumes?


Average Rating